ユーザーはどのWebサイトでも同じ機能を提供できると考えています。SNSだけでなくどんなWebサイトにも「通知を受ける」のドロップダウンがあるなかで、自分のサイトが非対応ではいけません。
幸いにもLaravelとPusherで、簡単に実装できます。本記事で紹介するコードはこちらで入手できます。
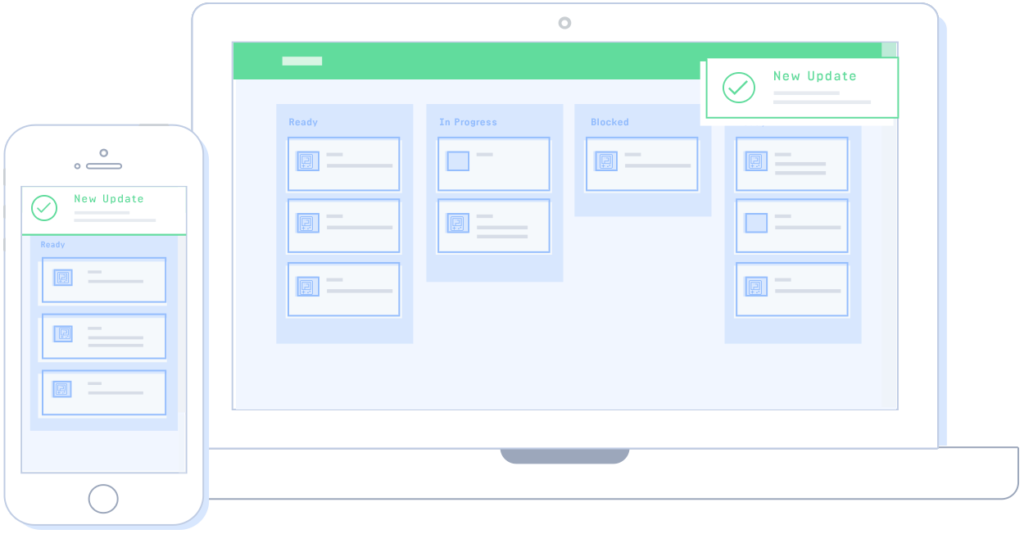
Pusher.comのイメージ
リアルタイム通知
リアルタイムの通知は優れたユーザーエクスペリエンスの必要条件です。Ajaxリクエストを一定間隔でバックエンドに送信して最新の通知を受け取る実現方法もありますが、より優れたアプローチはWebSocketsを利用して通知が送信されると同時に受信する方法です。詳しく紹介します。
Pusher
PusherとはWebサービスの1つで、WebSocketを使ってリアルタイムかつ両方向の通信機能をWebサイトやモバイルアプリに組み込むサービスです。
PusherのAPIはもともとシンプルですが、Laravel BroadcastingとLaravel Echoを組み合わせると極限までシンプルにできます。
この記事では、リアルタイム通知を既存のブログに追加する方法を紹介します。
基本的な機能はStreamで実現するリアルタイムLaravel通知に似ています。
まずはChristopher Vundiが作ったリポジトリ(少しだけ改変しています)を見てください。Simple Blogは、投稿された記事に対してユーザーがCRUDを実行する機能があります。
プロジェクト
初期化
まずはLaravelのSimple Blogをクローンします。
git clone https://github.com/vickris/simple-blog次にMySQLデータベースを作成し、データベースにアクセスする環境変数を設定します。
env.exampleを.envにコピーして、関連する変数を更新します。
cp .env.example .envDB_HOST=localhost
DB_DATABASE=homestead
DB_USERNAME=homestead
DB_PASSWORD=secret続いて次のコマンドでプロジェクトの依存オブジェクトをインストールします。
composer install次にマイグレーションとseedコマンドを実行して、データベースになんらかのデータを格納します。
php artisan migrate --seedアプリケーションを実行して/postsにアクセスすると、自動作成した投稿の一覧が表示されます。
このアプリケーションでユーザー登録や新規記事の投稿をしてください。簡単なアプリですが、デモにはぴったりです。
ユーザー同士のフォロー機能
ユーザー同士でフォローする機能を追加するために、ユーザー間にMany To Manyリレーションシップを構築します。
まずはユーザー同士を関連付けるピボットテーブルを作成します。次のコマンドでfollowersのマイグレーションの作成します。
php artisan make:migration create_followers_table --create=followersマイグレーションにuser_idとfollows_idのフィールドを追加します。user_idはフォロー元のユーザーID、follows_idはフォロー先のユーザーIDです。
マイグレーションを更新は以下の通りです。
public function up()
{
    Schema::create('followers', function (Blueprint $table) {
        $table->increments('id');
        $table->integer('user_id')->index();
        $table->integer('follows_id')->index();
        $table->timestamps();
    });
}
マイグレートしてテーブルを作成します。
php artisan migrateここまでの内容はStreamアプローチの記事とほぼ同じですが、ここからはStreamのアプローチとは異なる方法でフォローする機能を実装します。
Userモデルにリレーションシップを追加します。
// ...

class extends Authenticatable
{
    // ...

    public function followers()
    {
        return $this->belongsToMany(self::class, 'followers', 'follows_id', 'user_id')
                    ->withTimestamps();
    }

    public function follows()
    {
        return $this->belongsToMany(self::class, 'followers', 'user_id', 'follows_id')
                    ->withTimestamps();
    }
}ユーザーモデルにリレーションシップを追加しました。followersでユーザーのフォロワーをすべて取得して、followsはユーザーがフォローしているユーザーを取得します。
続いてヘルパー関数followとisFollowingを用意します。followはユーザーがほかのユーザーをフォローする関数で、isFollowingはユーザーが特定のユーザーをフォロー中か返す関数です。
// ...

class extends Authenticatable
{
    // ...

    public function follow($userId)
    {
        $this->follows()->attach($userId);
        return $this;
    }

    public function unfollow($userId)
    {
        $this->follows()->detach($userId);
        return $this;
    }

    public function isFollowing($userId)
    {
        return (boolean) $this->follows()->where('follows_id', $userId)->first(['id']);
    }

}
モデルを用意したので、次はユーザーをリスト化します。
ユーザーのリスト化
まずは必要なルートを設定します。
//...
Route::group(['middleware' => 'auth'], function () {
    Route::get('users', 'UsersController@index')->name('users');
    Route::post('users/{user}/follow', 'UsersController@follow')->name('follow');
    Route::delete('users/{user}/unfollow', 'UsersController@unfollow')->name('unfollow');
});
続いて、ユーザーのコントローラーを作成します。
php artisan make:controller UsersControllerindexメソッドを追加します。
// ...
use App\User;
class UsersController extends Controller
{
    //..
    public function index()
    {
        $users = User::where('id', '!=', auth()->user()->id)->get();
        return view('users.index', compact('users'));
    }
}このメソッドはビューが必要です。users.indexビューを作成して、内部に格納します。
@extends('layouts.app')

@section('content')
    <div class="container">
        <div class="col-sm-offset-2 col-sm-8">

            <!-- Following -->
            <div class="panel panel-default">
                <div class="panel-heading">
                    All Users
                </div>

                <div class="panel-body">
                    <table class="table table-striped task-table">
                        <thead>
                        <th>User</th>
                        <th> </th>
                        </thead>
                        <tbody>
                        @foreach ($users as $user)
                            <tr>
                                <td clphpass="table-text"><div>{{ $user->name }}</div></td>
                                @if (auth()->user()->isFollowing($user->id))
                                    <td>
                                        <form action="{{route('unfollow', ['id' => $user->id])}}" method="POST">
                                            {{ csrf_field() }}
                                            {{ method_field('DELETE') }}

                                            <button type="submit" id="delete-follow-{{ $user->id }}" class="btn btn-danger">
                                                <i class="fa fa-btn fa-trash"></i>Unfollow
                                            </button>
                                        </form>
                                    </td>
                                @else
                                    <td>
                                        <form action="{{route('follow', ['id' => $user->id])}}" method="POST">
                                            {{ csrf_field() }}

                                            <button type="submit" id="follow-user-{{ $user->id }}" class="btn btn-success">
                                                <i class="fa fa-btn fa-user"></i>Follow
                                            </button>
                                        </form>
                                    </td>
                                @endif
                            </tr>
                        @endforeach
                        </tbody>
                    </table>
                </div>
            </div>
        </div>
    </div>
@endsection/usersページにアクセスして、ユーザーのリストが表示されることを確認してください。
フォローとフォロー解除
UsersControllerにfollowとunfollowメソッドを追加します。
//...
class UsersController extends Controller
{
    //...
    public function follow(User $user)
    {
        $follower = auth()->user();
        if ($follower->id == $user->id) {
            return back()->withError("You can't follow yourself");
        }
        if(!$follower->isFollowing($user->id)) {
            $follower->follow($user->id);

            // sending a notification
            $user->notify(new UserFollowed($follower));

            return back()->withSuccess("You are now friends with {$user->name}");
        }
        return back()->withError("You are already following {$user->name}");
    }

    public function unfollow(User $user)
    {
        $follower = auth()->user();
        if($follower->isFollowing($user->id)) {
            $follower->unfollow($user->id);
            return back()->withSuccess("You are no longer friends with {$user->name}");
        }
        return back()->withError("You are not following {$user->name}");
    }
}フォロー関連の機能を実装しました。/usersページからユーザーのフォローとフォロー解除ができます。
通知
LaravelのNotificationクラスには、Emails、SMS、Webサイトなどで通知を送るAPIが用意されています。
2種類の通知を実装します。
- フォロー通知:ほかのユーザーからフォローされたことを通知
- 投稿通知:フォロー中のユーザーが新規投稿したことを通知
フォロー通知
artisanコマンドで、通知のマイグレーションを作成します。
php artisan notifications:tableマイグレートして新しいテーブルを作成します。
php artisan migrateフォロー通知から着手します。次のコマンドを実行してNotificationクラスを作成します。
php artisan make:notification UserFollowed作成したNotificationクラスを編集します。
class UserFollowed extends Notification implements ShouldQueue
{
    use Queueable;

    protected $follower;

    public function __construct(User $follower)
    {
        $this->follower = $follower;
    }

    public function via($notifiable)
    {
        return ['database'];
    }

    public function toDatabase($notifiable)
    {
        return [
            'follower_id' => $this->follower->id,
            'follower_name' => $this->follower->name,
        ];
    }
}コードはこれだけですが、たくさんのことをしています。まず、Notificationを作成するときに$followerのインスタンスを挿入します。
viaメソッドでLaravelにdatabaseチャネルで通知を送るよう指示します。このメソッドを実行すると、LaravelはNotificationsテーブルに新しいレコードを作成します。
user_idと通知のtypeは自動的に設定されます。さらにtoDatabaseを使って、Notificationを継承してデータを追加します。戻り値の配列はNotificationのdataフィールドに追加されます。
Laraveは自動的にNotificationをキューに追加してバックグラウンドで実行するので、レスポンス時間が短くなります。あとでPusherを使うときにHTTPコールを追加するため最後にShouldQueueを実装します。
以下のコードで、ユーザーがフォロ―されたときにNotificationを実行できるようにします。
// ...
use App\Notifications\UserFollowed;
class UsersController extends Controller
{
    // ...
    public function follow(User $user)
    {
        $follower = auth()->user();
        if ( ! $follower->isFollowing($user->id)) {
            $follower->follow($user->id);

            // add this to send a notification
            $user->notify(new UserFollowed($follower));

            return back()->withSuccess("You are now friends with {$user->name}");
        }

        return back()->withSuccess("You are already following {$user->name}");
    }

    //...
}UserモデルにはNotifiableトレイトがあるので、notifyメソッドを呼び出します。
notifyしたいモデルは、Notifiableトレイトを使ってnotifyメソッドにアクセスできるようにします。
通知を既読にする
Notificationには通知の内容とリソースへのリンクが含まれます。新しい投稿の通知なら説明文と新しい投稿へのリンクがあり、閲覧するとその通知を既読とします。
リクエストに?read=notification_idインプットが含まれているか確認して既読をマークするミドルウェアを次のコマンドで作成します。
php artisan make:middleware MarkNotificationAsRead次のコードをミドルウェアのhandleメソッドに追加します。
class MarkNotificationAsRead
{
    public function handle($request, Closure $next)
    {
        if($request->has('read')) {
            $notification = $request->user()->notifications()->where('id', $request->read)->first();
            if($notification) {
                $notification->markAsRead();
            }
        }
        return $next($request);
    }
}リクエストごとにミドルウェアを実行するように、$middlewareGroupsに追加します。
//...
class Kernel extends HttpKernel
{
    //...
    protected $middlewareGroups = [
        'web' => [
            //...

            \App\Http\Middleware\MarkNotificationAsRead::class,
        ],
        // ...
    ];
    //...
}
通知を表示します。
通知の表示
Ajaxを使って通知の一覧を表示し、Pusherでリアルタイムに更新します。まずはnotificationsメソッドをコントローラーに追加します。
// ...
class UsersController extends Controller
{
    // ...
    public function notifications()
    {
        return auth()->user()->unreadNotifications()->limit(5)->get()->toArray();
    }
}
これで直近5件の未読の通知を取得できます。アクセスするルートを追加します。
//...
Route::group([ 'middleware' => 'auth' ], function () {
    // ...
    Route::get('/notifications', 'UsersController@notifications');
});
続いてヘッダーに通知のドロップダウンを追加します。
<head>
    <!-- // ... // -->

    <!-- Scripts -->
    <script>
        window.Laravel = <?php echo json_encode([
            'csrfToken' => csrf_token(),
        ]); ?>
    </script>

    <!-- This makes the current user's id available in javascript -->
    @if(!auth()->guest())
        <script>
            window.Laravel.userId = <?php echo auth()->user()->id; ?>
        </script>
    @endif
</head>
<body>
    <!-- // ... // -->
    @if (Auth::guest())
        <li><a href="{{ url('/login') }}">Login</a></li>
        <li><a href="{{ url('/register') }}">Register</a></li>
    @else
        <!-- // add this dropdown // -->
        <li class="dropdown">
            <a class="dropdown-toggle" id="notifications" data-toggle="dropdown" aria-haspopup="true" aria-expanded="true">
                <span class="glyphicon glyphicon-user"></span>
            </a>
            <ul class="dropdown-menu" aria-labelledby="notificationsMenu" id="notificationsMenu">
                <li class="dropdown-header">No notifications</li>
            </ul>
        </li>
<!-- // ... // -->現在のユーザーIDを取得するために、グローバル変数window.Laravel.userIdをスクリプトに追加しています。
JavaScriptとSASS
Laravel Mixを使ってJavaScriptとSASSをコンパイルします。まずはnpmパッケージをインストールします。
npm install続いて、次のコードをapp.jsに追加します。
window._ = require('lodash');
window.$ = window.jQuery = require('jquery');
require('bootstrap-sass');

var notifications = [];

const NOTIFICATION_TYPES = {
    follow: 'App\\Notifications\\UserFollowed'
};ここでは初期化のみです。AjaxやPusherで取得したNotificationオブジェクトを格納するにはnotificationsを使います。NOTIFICATION_TYPESにNotificationの種類が格納されています。
AjaxでNotificationをGETします。
//...
$(document).ready(function() {
    // check if there's a logged in user
    if(Laravel.userId) {
        $.get('/notifications', function (data) {
            addNotifications(data, "#notifications");
        });
    }
});

function addNotifications(newNotifications, target) {
    notifications = _.concat(notifications, newNotifications);
    // show only last 5 notifications
    notifications.slice(0, 5);
    showNotifications(notifications, target);
}
最新の通知をAPIから受け取りドロップダウンに追加します。
現在のNotificationをaddNotificationsに集約しています。新しいものにはLodashを使って、最新の5件を取り出します。
完成にはまだいくつかの関数が必要です。
//...
function showNotifications(notifications, target) {
    if(notifications.length) {
        var htmlElements = notifications.map(function (notification) {
            return makeNotification(notification);
        });
        $(target + 'Menu').html(htmlElements.join(''));
        $(target).addClass('has-notifications')
    } else {
        $(target + 'Menu').html('<li class="dropdown-header">No notifications</li>');
        $(target).removeClass('has-notifications');
    }
}この関数は、すべてのNotificationの文字列を構築してドロップダウンに追加します。
Notificationがなければ「No notifications」と表示します。
またドロップダウンボタンにクラスを追加し、Notificationが存在すればGitHubのように色が変わります。
Notificationの文字列を作るヘルパー関数を追加します。
//...

// Make a single notification string
function makeNotification(notification) {
    var to = routeNotification(notification);
    var notificationText = makeNotificationText(notification);
    return '<li><a href="' + to + '">' + notificationText + '</a></li>';
}

// get the notification route based on it's type
function routeNotification(notification) {
    var to = '?read=' + notification.id;
    if(notification.type === NOTIFICATION_TYPES.follow) {
        to = 'users' + to;
    }
    return '/' + to;
}

// get the notification text based on it's type
function makeNotificationText(notification) {
    var text = '';
    if(notification.type === NOTIFICATION_TYPES.follow) {
        const name = notification.data.follower_name;
        text += '<strong>' + name + '</strong> followed you';
    }
    return text;
}app.scssに追加します。
//...
#notifications.has-notifications {
  color: #bf5329
}
アセットをコンパイルします。
npm run devユーザーをフォローすると、フォローされたユーザーに通知が届きます。フォローされたユーザーが通知をクリックすると/usersにリダイレクトされ、通知が消えます。
新規投稿の通知
ユーザーが投稿したときにフォロワーに通知する機能を実装します。
Notificationクラスを作成します。
php artisan make:notification NewPost自動作成されたクラスを編集します。
// ..
use App\Post;
use App\User;
class NewArticle extends Notification implements ShouldQueue
{
    // ..
    protected $following;
    protected $post;

    public function __construct(User $following, Post $post)
    {
        $this->following = $following;
        $this->post = $post;
    }

    public function via($notifiable)
    {
        return ['database'];
    }

    public function toDatabase($notifiable)
    {
        return [
            'following_id' => $this->following->id,
            'following_name' => $this->following->name,
            'post_id' => $this->post->id,
        ];
    }
}
通知の送信を実装します。いくつかの方法があります。
この記事ではEloquent Observerを使います。
Postのオブザーバーを作成してイベントを監視します。app/Observers/PostObserver.phpクラスを作成します。
namespace App\Observers;

use App\Notifications\NewPost;
use App\Post;

class PostObserver
{
    public function created(Post $post)
    {
        $user = $post->user;
        foreach ($user->followers as $follower) {
            $follower->notify(new NewPost($user, $post));
        }
    }
}オブザーバーをAppServiceProviderに登録します。
//...
use App\Observers\PostObserver;
use App\Post;

class AppServiceProvider extends ServiceProvider
{
    //...
    public function boot()
    {
        Post::observe(PostObserver::class);
    }
    //...
}
メッセージをJSで表示するためフォーマットします。
// ...
const NOTIFICATION_TYPES = {
    follow: 'App\\Notifications\\UserFollowed',
    newPost: 'App\\Notifications\\NewPost'
};
//...
function routeNotification(notification) {
    var to = `?read=${notification.id}`;
    if(notification.type === NOTIFICATION_TYPES.follow) {
        to = 'users' + to;
    } else if(notification.type === NOTIFICATION_TYPES.newPost) {
        const postId = notification.data.post_id;
        to = `posts/${postId}` + to;
    }
    return '/' + to;
}

function makeNotificationText(notification) {
    var text = '';
    if(notification.type === NOTIFICATION_TYPES.follow) {
        const name = notification.data.follower_name;
        text += `<strong>${name}</strong> followed you`;
    } else if(notification.type === NOTIFICATION_TYPES.newPost) {
        const name = notification.data.following_name;
        text += `<strong>${name}</strong> published a post`;
    }
    return text;
}
これでユーザーにフォローと新規投稿の通知が送られます。試してください!
Pusherでリアルタイム通知
Pusherを使ってWebsocketで通知をリアルタイムに受け取ります。
pusher.comに無料登録して、新しいアプリを作成します。
...

BROADCAST_DRIVER=pusher
PUSHER_KEY=
PUSHER_SECRET=
PUSHER_APP_ID=broadcasting設定ファイルにアカウントのオプションを追加します。
    //...
    'connections' => [

            'pusher' => [
                //...
                'options' => [
                    'cluster' => 'eu',
                    'encrypted' => true
                ],
            ],
//...providersの配列にApp\Providers\BroadcastServiceProviderを登録します。
// ...
'providers' => [
    // ...
    App\Providers\BroadcastServiceProvider
    //...
],
//...
PusherのPHP SDKとLaravelのEchoが必要です。
composer require pusher/pusher-php-servernpm install --save laravel-echo pusher-js送信する通知のデータが必要なので、UserFollowed Notificationを編集します。
//...
class UserFollowed extends Notification implements ShouldQueue
{
    // ..
    public function via($notifiable)
    {
        return ['database', 'broadcast'];
    }
    //...
    public function toArray($notifiable)
    {
        return [
            'id' => $this->id,
            'read_at' => null,
            'data' => [
                'follower_id' => $this->follower->id,
                'follower_name' => $this->follower->name,
            ],
        ];
    }
}
次はNewPostです。
//...
class NewPost extends Notification implements ShouldQueue
{

    //...
    public function via($notifiable)
    {
        return ['database', 'broadcast'];
    }
    //...
    public function toArray($notifiable)
    {
        return [
            'id' => $this->id,
            'read_at' => null,
            'data' => [
                'following_id' => $this->following->id,
                'following_name' => $this->following->name,
                'post_id' => $this->post->id,
            ],
        ];
    }
}JavaScriptを更新します。app.jsを開いて次のコードを追加します。
// ...
window.Pusher = require('pusher-js');
import Echo from "laravel-echo";

window.Echo = new Echo({
    broadcaster: 'pusher',
    key: 'your-pusher-key',
    cluster: 'eu',
    encrypted: true
});

var notifications = [];

//...

$(document).ready(function() {
    if(Laravel.userId) {
        //...
        window.Echo.private(`App.User.${Laravel.userId}`)
            .notification((notification) => {
                addNotifications([notification], '#notifications');
            });
    }
});
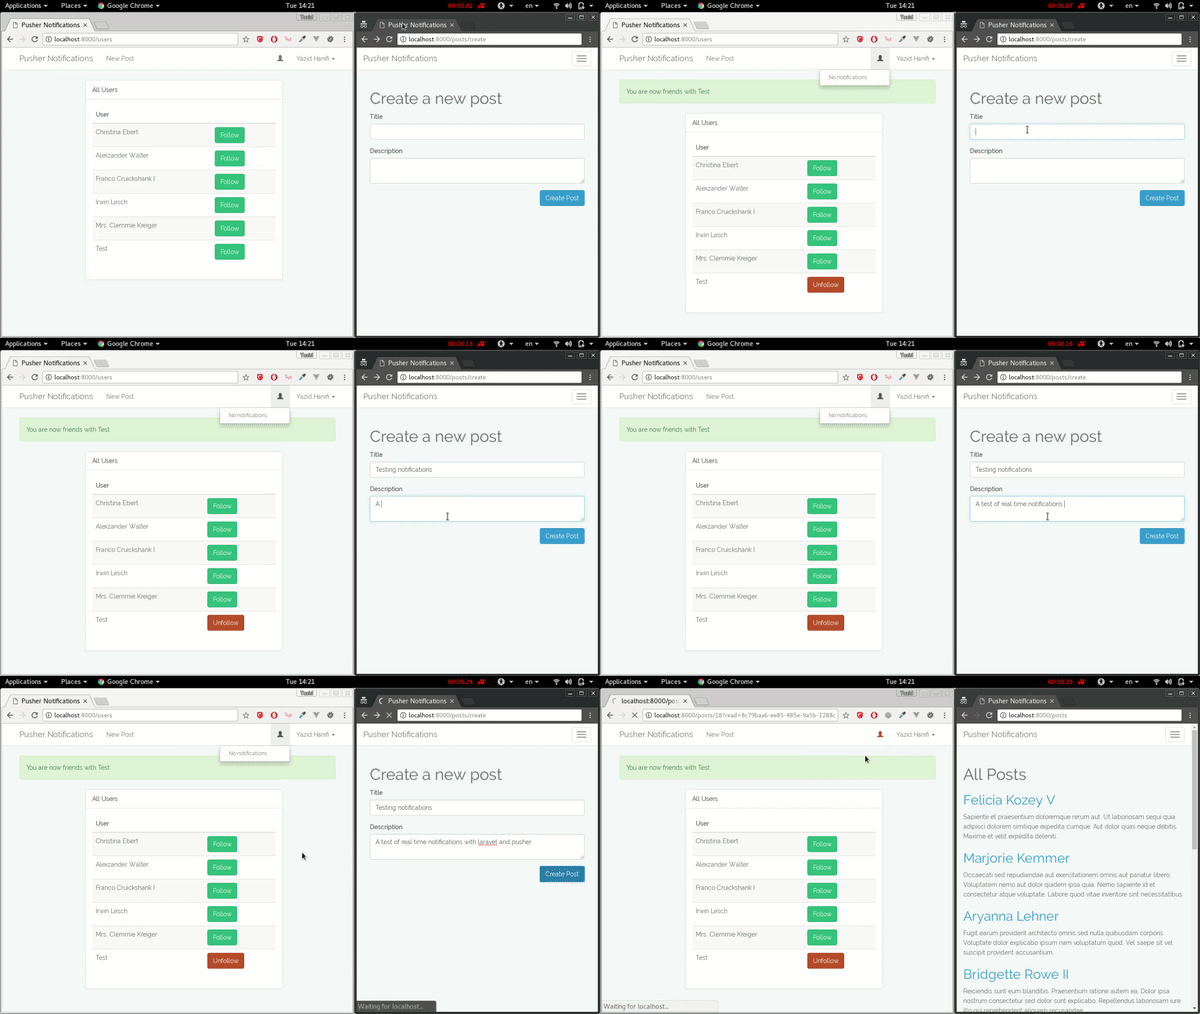
通知がリアルタイムに反映されます。アプリを触って、通知が更新されることを確認してください。
最後に
Pusherにはリアルタイムにイベントを受信するためのシンプルなAPIがあります。これをLaravelのNotificationと組み合わせると、1カ所から通知をいろいろなチャネル(Email、SMS、Slackなど)で送信できます。この記事では、ユーザーをフォローする機能をSimple Blogに追加しました。またリアルタイムの機能を強化するためのツールも紹介しました。
PusherやLaravel Notificationでできることはたくさんあります。この組み合わせなら、Pub/Subメッセージをリアルタイムでブラウザーやモバイル、IoTデバイスに送信するサービスも実現できます。ほかにもユーザーのオンライン/オフライン状態を取得するプレゼンスAPIもあります。
詳しくはドキュメント(Pusher doc、Pusher tutorial、Laravel doc)にアクセスして、PusherやLaravelでできることを調べてください。
本記事はRafie Younes、Wern Anchetaが査読を担当しています。最高のコンテンツに仕上げるために尽力してくれたSitePointの査読担当者のみなさんに感謝します。
(原文:How to Add Real-Time Notifications to Laravel with Pusher)
[翻訳:内藤 夏樹/編集:Livit]


